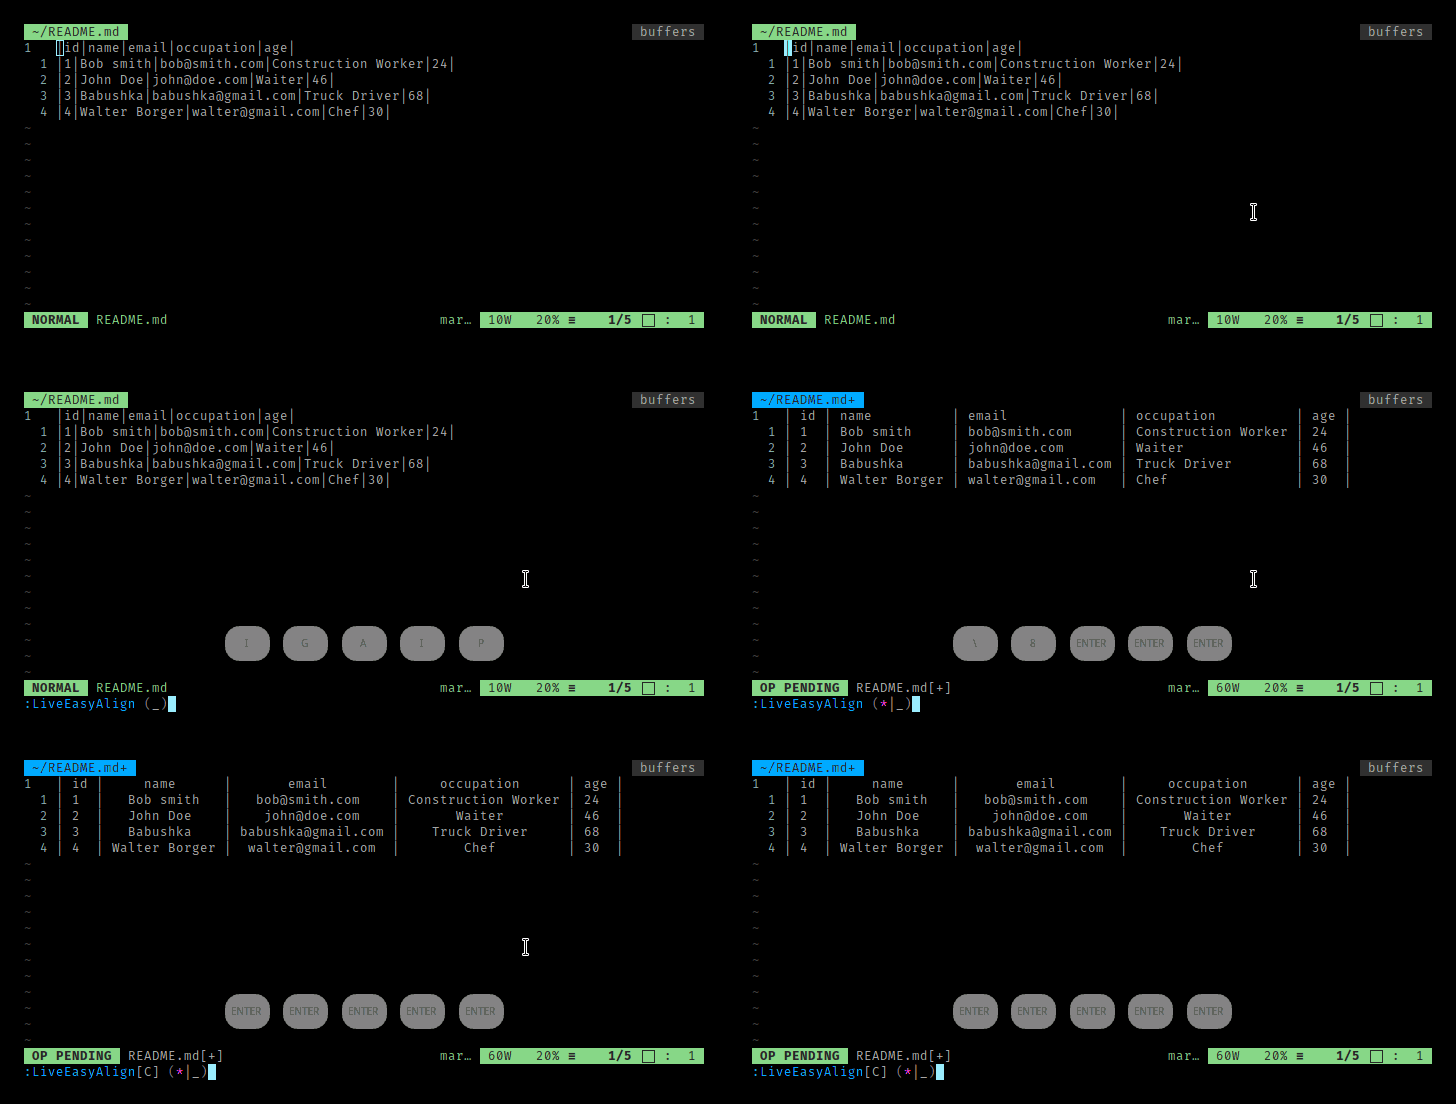
Aligning code, in general, does not provide any value. It’s just to make code look more beautiful and easier to read.
Meet Vim Easy Align.
Installation & Configuration
Using vim-plug
Plug 'junegunn/vim-easy-align'And add the following mappings to your
.vimrcfile
xmap ga <Plug>(EasyAlign)
nmap ga <Plug>(EasyAlign)
Feel free to change the default mapping
gato something you’re more comfortable with.
Note: If you’re not familiar with
nmapand
xmap, they’re used to add mappings for normal and visual mode respectively.
Usage
While in normal mode type
gaip=Explanation: Start the EasyAlign command (
ga) for
inner
paragraph and align around the
=sign.
Type
ga=Explanation: Start the EasyAlign command (
ga) and align around the
=sign.
Options
Let’s say for example you want to align javascript module imports around the
fromkeyword.
You would use the command
ga<Ctrl-x>fromAfter that, press
Ctrl-x(Control + x) to enter the
regular expressionmode.
Lastly you can enter whatever you want to align your code around (in this case it’s
from)
So, for example,
=(equal) signs are normally aligned to the right while
:(colons) are aligned to the left.
ga->:Align right
ga:Align left (we don’t have to use
<-since it’s the default for colons)
Or you could add the following to your
.vimrcif you prefer shortcuts.
" Change <iga> to whatever you like
nmap iga <Plug>(LiveEasyAlign)
xmap iga <Plug>(LiveEasyAlign)
Conclusion
- Vim Easy Align https://github.com/junegunn/vim-easy-align
- Vim Plug https://github.com/junegunn/vim-plug
This article has been published from the source link without modifications to the text. Only the headline has been changed.
Source link


