DejaDup is the default backup application for Gnome. It’s a GUI for duplicity, focuses on simplicity, supports incremental encrypted backups and up until recently supported a large number of cloud providers. Unfortunately as of version 42.0, all major cloud providers have been removed. Thus given that Ubuntu 20.10 ships with the specific version, any user who upgrades and has backups on Amazon S3 won’t be able to access them. In this blog post, we will provide a solution that will allow you to continue taking backups on AWS S3 using DejaDup.
The mandatory rant (feel free to skip)
The removal of the cloud providers should not come as a surprise. I’m not exactly sure which version of DejaDup deprecated them but it was around the release of Ubuntu 17.10 when they were all hidden as an option. So for 3 long years, people who had backups on Amazon S3, Google Cloud Storage, Openstack Swift, Rackspace etc could still use the deprecated feature and prepare for the inevitable removal.
So why complain you might ask? Well, first of all, when you update from an earlier version of Ubuntu to 20.10, you don’t really know that the all cloud providers are removed from DejaDup. Hence if something goes wrong during the update, you won’t be able to easily access your backups and restore your system.
Another big problem is the lack of storage options on the last version of DejaDup. They decided to change their policy and support only “consumer-targeted cloud services” but currently they only support Google Drive. So they eliminated all the cost efficient options for mass storage and kept only one single very expensive option. I’m not really sure how this is good for the users of the application. Linux was always about having a choice (too much of it in many cases), so why not maintain multiple storage options to serve both the experienced and inexperienced users? Thankfully because we are on Linux, we have option to fix this.
How to use Deja Dup v42+ with AWS S3

WARNING: I have not tested thoroughly the following setup so use it at your own risk. If the computer explodes in your face, you lose your data, or your spouse takes your kids and leaves you, don’t blame me.
Installing s3fs fuse
With that out of the way, let’s proceed to the fix. We will use s3fs fuse, a program that allows you to mount an S3 bucket via FUSE and effectively make it look like a local disk. Thankfully you don’t have to compile it from source as it’s on Ubuntu’s repos. To install it, type the following in your terminal:
sudo apt install s3fs
Setting up your AWS credentials file
Next, we need to configure your credentials. The s3fs supports two methods for authentication: an AWS credential file or a custom passwd file. In this tutorial we will use the first method but if you are interested for the latter feel free to view the s3fs documentation on Github. To setup your credentials make sure that the file ~/.aws/credentials contains your AWS access id and secret key. It should look like this:
[default]

aws_access_key_id=YOUR_ACCESS_KEY_ID

aws_secret_access_key=YOUR_SECRET_ACCESS_KEY
Mounting your bucket to your local filesystem
Once your have your credentials file you are ready to mount your backup bucket. If you don’t remember the bucket name you can find it by visiting your AWS account. To mount and unmount the bucket to/from a specific location type:
# mount

s3fs BUCKET_NAME /path/to/location
# unmount
fusermount -u /path/to/location
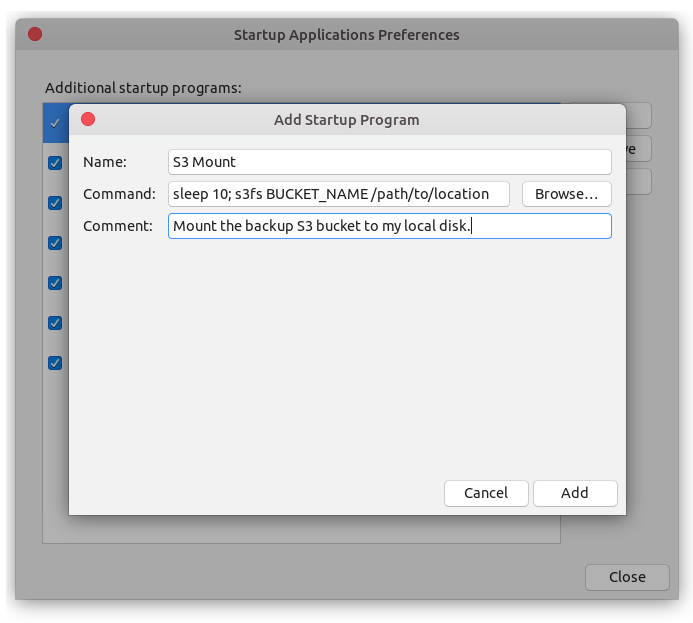
Mounting the bucket like this is only temporary and will not persist across reboots. You can add it on /etc/fstab but I believe this only works with the passwd file. If you want to use your AWS credentials file an easy workaround it to create a shortcut in your Startup Applications Preferences.

Note that you can add a small 10 sec delay to ensure that the WiFi is connected before you try to mount the bucket. Internet access is obviously necessary for mounting it successfully. If you are behind VPNs or have other complex setups, you can also create a bash script that makes the necessary checks before you execute the mount command.
Configuring DejaDup
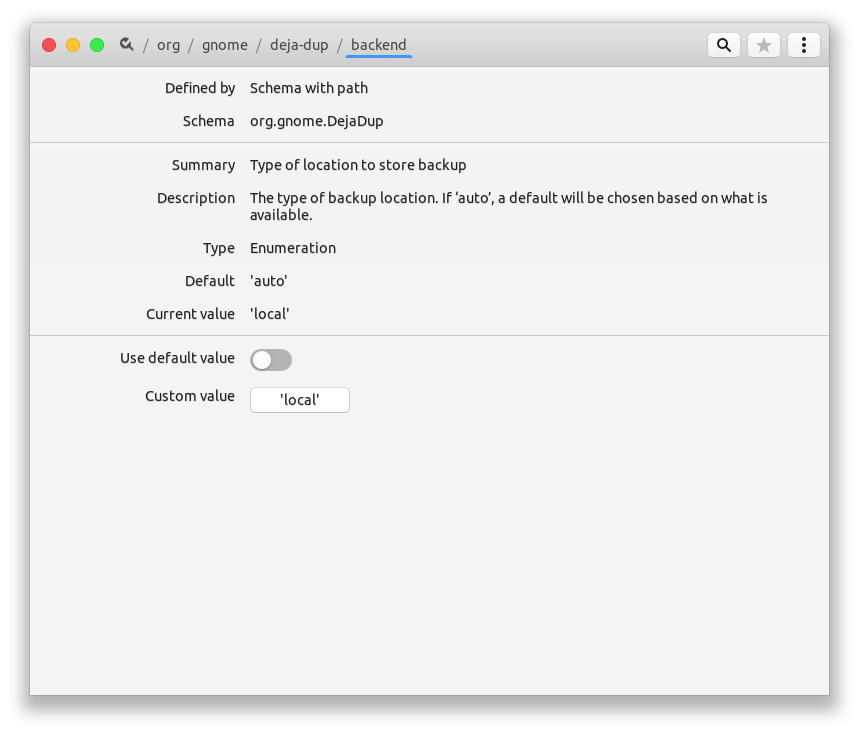
With the bucket mounted as a local drive, we can now easily configure DejaDup to use it. First of all we need to change the backend to local. This can be done either by using a program like dconfig or the console with the following command:
gsettings set org.gnome.DejaDup backend 'local'

Finally we open DejaDup, go to preferences and point the storage location to the directory that has your S3 backup files. Make sure you select the subdirectory that contains the backup files; this is typically a subdirectory in your mount point that has name equal to your computer’s hostname. Last but not least, make sure that the S3 mount directory is excluded from DejaDup! To do this, check the ignored folders in Preferences.

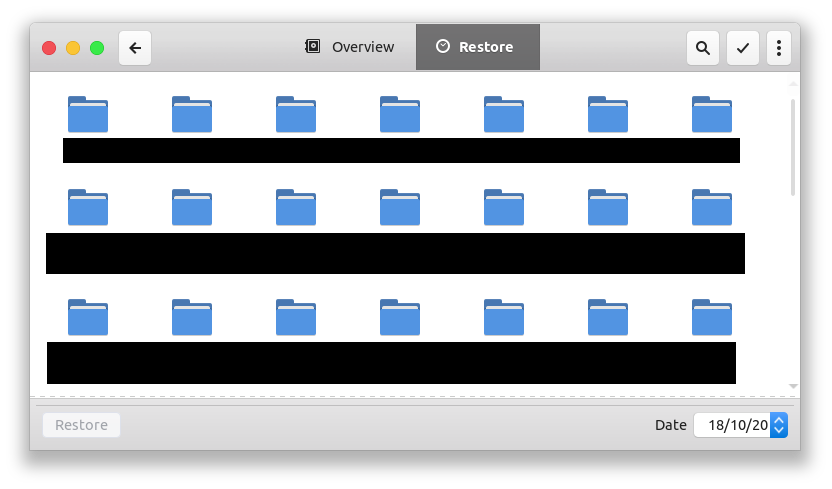
That’s it! Now go to your restore tab and DejaDup will be able to read your previous backups. You can also take new ones.
Gotchas
There are a few things to keep in mind in this setup:
- First of all, you must be connected on the internet when you mount the bucket. If you are not the bucket won’t be mounted. So, I advise you instead of just calling the mount command, to write a bash script that does the necessary checks before mounting (internet connection is on, firewall allows external requests etc).
- Taking backups like that seems slower than using the old native S3 support and it is likely to generate more network traffic (mind AWS traffic costs!). This is expected because DejaDup thinks it’s accessing the local file-system, so there is no need for aggressive caching or minimization of operations that cause network traffic.
- You should expect stability issues. As we said earlier, DejaDup does not know it writes data over the wire so much of the functionalities that usually exist in such setups (such as retry-on-fail) are missing. And obviously if you lose connection midway of the backup you will have to delete it and start a new one to avoid corrupting your future backups.
- Finally keep in mind that this is a very experimental setup and if you really want to have a reliable solution, you should do your own research and select something that meets your needs.
If you have a recommendation for an Open-Source Backup solution that allows locally encrypted incremental backups, supports S3 and has an easy to use UI please leave a comment as I’m more than happy to give it a try.
This article has been published from the source link without modifications to the text. Only the headline has been changed.


