Ganache is used for setting up a personal Ethereum Blockchain for testing your Solidity contracts. It provides more features when compared to Remix. You will learn about the features when you work out with Ganache. Before you begin using Ganache, you must first download and install the Blockchain on your local machine.
Downloading Ganache
You may download Ganache from the following URL:
https://truffleframework.com/ganache
Ganache is available on several platforms. We developed and tested this entire tutorial on Mac. Thus, the screenshots below will show Mac installation. When you open the installation URL given above, it automatically detects your machine’s OS and directs you to the appropriate binary installation. The screenshot below shows the Mac installation.
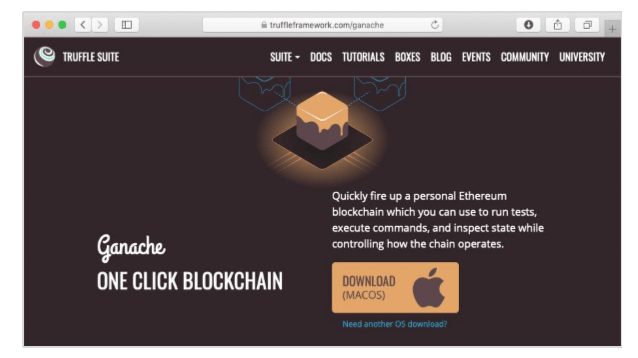
When you click on the DOWNLOAD button, it will begin downloading the DMG file for Mac installation.
Installing Ganache
Locate the “Ganache-2.0.0.dmg” in your Downloads folder and double-click on it to install Ganache. Upon successful installation, the following screen will appear:
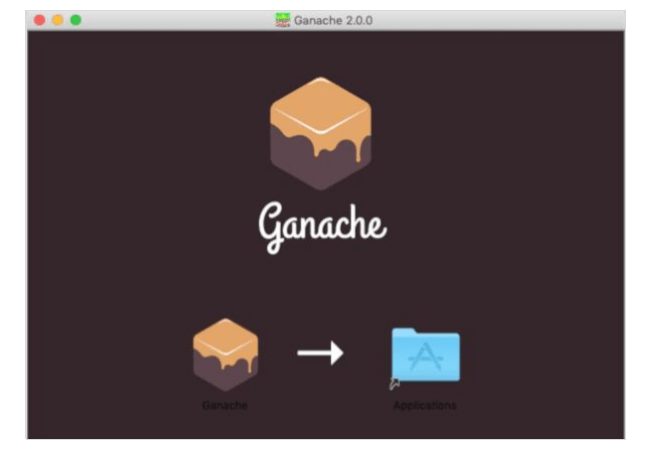
Drag Ganache icon to the Application folder. Now, Ganache is available as an application on your Mac.
If you are using some other OS, follow the instructions provided for successful installation.
Starting Ganache
Now locate Ganache in your Application folder and double-click on its icon to start Ganache.
Ganache Desktop
When Ganache starts, the Ganache screen will appear as shown below:
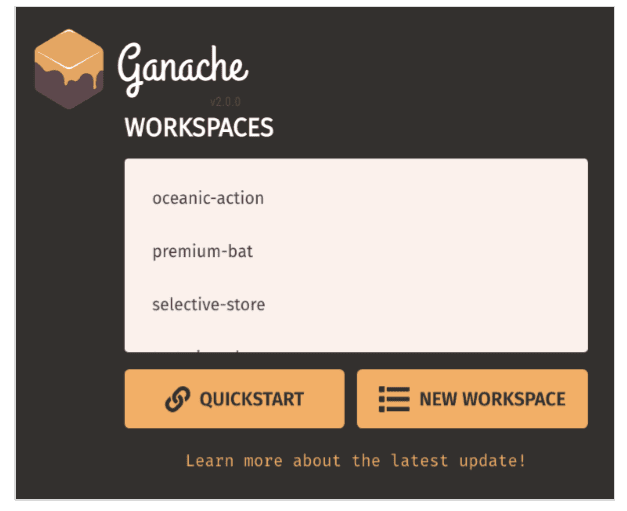
Click QUICKSTART to start Ganache. You will see Ganache console as shown below:

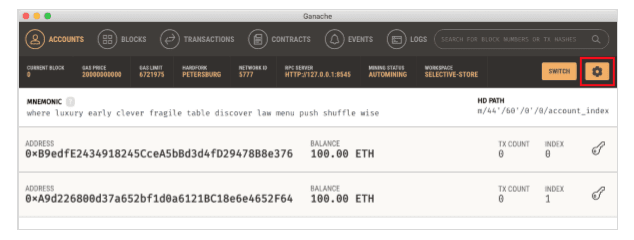
The console in the above screenshot shows two user accounts with balance of 100 ETH (Ether – a currency for transaction on Ethereum platform). It also shows a transaction count of zero for each account. As the user has not performed any transactions so far, this count is obviously zero.
We will now get an overview of a few important screens of Ganache that are of immediate relevance to us.
Ethereum — Ganache Server Settings
Click on the settings icon at the top right hand side of the screen as shown in the screenshot below:
The server settings screen will appear as shown below:
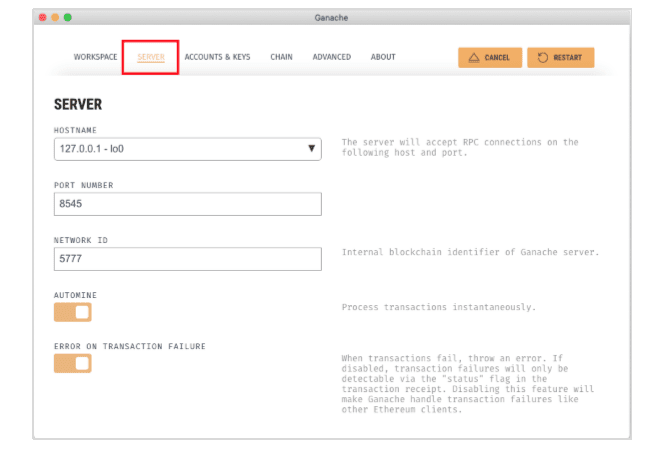
Here, you will be able to set the values of server address and the port number for your Ganache server. For the time being, leave these to their default values. The Network ID is an internal Blockchain identifier of Ganache server; leave this to its default value. The Automine button is in the ON state indicating that the transactions would be processed instantly. If you switched this off, it will ask you to enter the time in seconds after which the blocks would be mined.
Account and Keys
When you click on the Accounts & Keys menu option, you will see the following screen:
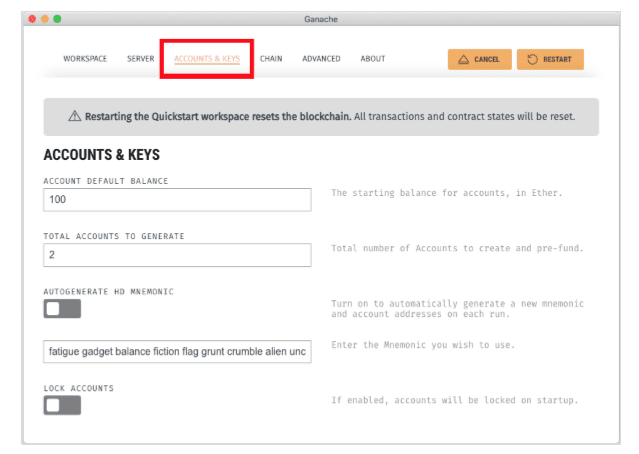
Here you would be able to set the default balance for each account. The default value is 100. This now explains why you saw 100 ETH displayed for each account in the Desktop screenshot. You can also set the number of accounts on this screen. The value displayed in this screenshot is 2 and that is why the desktop showed only two accounts.
Now, we will work out with the two settings’ screen; the knowledge of how these two work would suffice. Restart the server by clicking on the RESTART button in the right hand side of the screen. You will now return to the Desktop screen. Try inputting different values in the above two fields, restart the server and see its effect.
Ethereum — A Quick Walkthrough
We will now briefly understand what is available on the Ganache desktop. On the Desktop, at the top we have several menu options out of which a few are of immediate relevance to us. The menu bar is highlighted in the screenshot below:
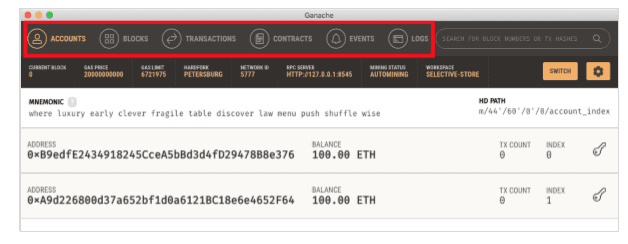
Clicking on the TRANSACTIONS menu shows all the transactions performed so far. You will be performing transactions very soon. Now, come back to the above screen and check the transactions from time to time. A typical transaction screen is as shown below:
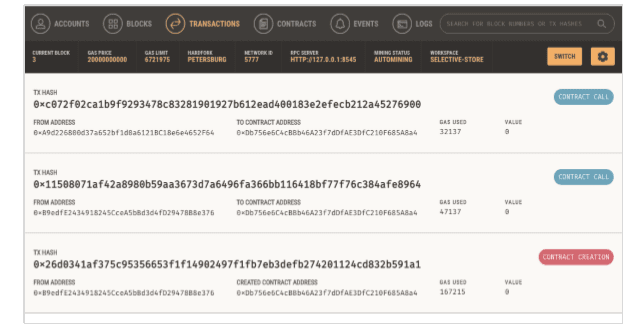
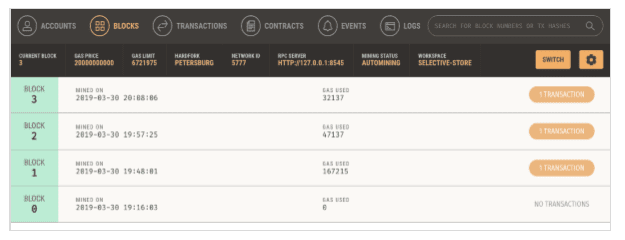
Likewise, when you click on the BLOCKS menu, you will see the various mined blocks. Consider the following screenshot to understand how the BLOCKS menu looks like:
Click on the LOGS menu. It will open the system log for you. Here, you can examine the various operations that you have performed on the Ethereum Blockchain.
Now, as you have understood how to use Ganache for setting up a private Ethereum Blockchain, you will now create a few clients who would use this Blockchain.
This article has been published from the source link without modifications to the text. Only the headline has been changed.
[ad_2]


