Using Generative Adversarial Networks to restore image quality.
GANs (Generative Adversarial Networks) have taken the world of deep learning and computer vision by storm since they were introduced by Goodfellow et al. in 2014 at NIPS. The main idea of GANs is to simultaneously train two models; a generator model G that captures a certain data distribution, and another discriminator model D that determines whether a sample came from the original distribution or from G.
The GAN framework is like a two player min-max game. G continually improves to generate images that are more realistic and have better quality. D improves in its ability to determine whether an image was created by G. Training a GAN can be done completely with backpropagation, which highly simplifies the training process. Typically, training is performed by regular switching from G to D in order to prevent a huge performance gap in the two models.
Image Restoration
To explain GANs in more detail, we will use the example of image restoration, using the code from Lesson 7 of course-v3 from fast.ai. You can make a copy of the notebook on Google Colab and run the code yourself while reading through for a more hands-on experience! An advantage is that we only need an unlabeled dataset of images to create an image restoration model. The aim of this model is to restore a low resolution image and remove simple watermarks. Here is a brief overview of the image restoration process:
- Decide on the dataset to use. In this post we will be using the Oxford-IIIT Pet Dataset, which is publicly available under a CC 4.0 License.
- ‘Crappify’ the dataset by performing certain transformations to the images.
- Pre-train a generator network with a UNet architecture to transform crappified images back into the original images.
- Generate an initial set of restored images that can be used to pre-train the critic.
- Pre-train a critic network to classify generated images as ‘fake’ and original images as ‘real’.
- Train the entire GAN structure, switching from Generator to Critic as per the GAN paper.
- Finally, we will obtain a generator network that can be used to restore other images that are of lower quality!
Dataset generation
To create a labeled dataset, we use a random function to ‘crappify’ our images, and here are the applied transformations:
- Addition of random text/numbers
- Decrease image quality by resizing to a smaller resolution, then resizing back to the original resolution
Below is a sample of the crappified images on the left, and the original images on the right. We can see that the quality is severely decreased and some of the images have random number watermarks added to them!
Pre-Training Generator and Critic
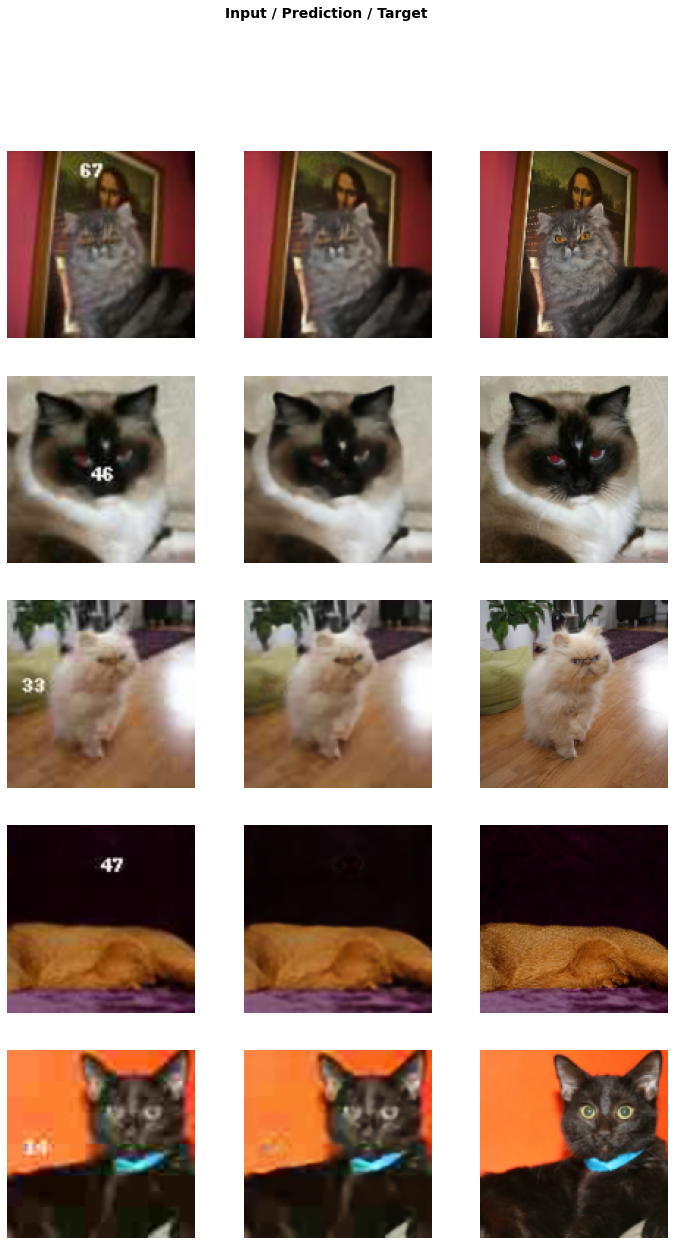
With the dataset, we pretrain the UNet model to produce the original images give the crappified images as input. This is trained using a mean-squared error loss. ResNet34 was used as the backbone, and this was also pre-trained on ImageNet so that we can save some computation time! Here are the results of pre-training the generator network after just 5 epochs (About 10 minutes on Google Colab free GPU):

We observe that the generator model is able to partially restore some of the image quality. Also, most of the watermarked numbers have been erased and filled over by the model! This is pretty great performance for just 10 minutes of training time. However, there is still a large gap in image quality; evidently, a simple mean squared error loss is not sufficient to perform full image restoration.
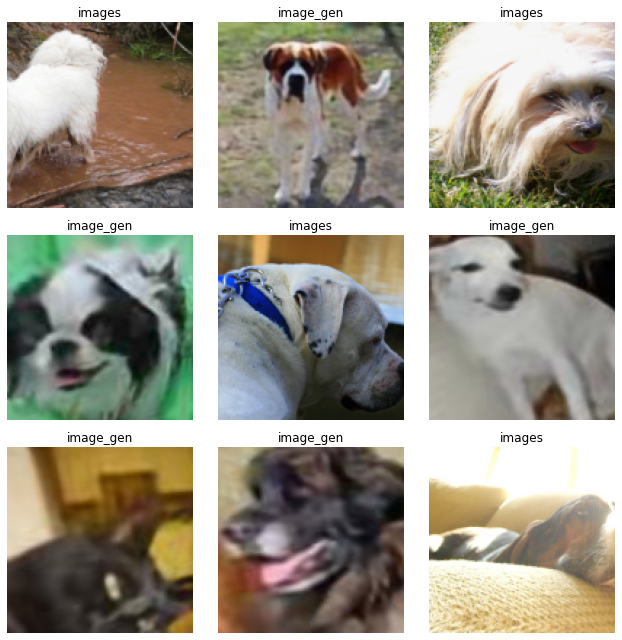
To pre-train the critic, we simply use the generator outputs from above and put them into one directory. The critic will retrieve labels from the directory name, and will learn to classify these images as real or fake. Below are some samples from one batch of the critic pre-training dataset:

GAN training
In this part, I will only briefly explain the details of GAN training, and instead focus on the intuition and tricks to improve its stability. For the full explanation, Joseph Rocca has a great article about it!
To train the GAN, we need to alternate between updating Generator G and Discriminator/Critic D. G will be trained using an adversarial loss which describes how likely the generated samples can fool D. Mean squared error loss is also used to ensure that G does not start producing samples that do not look like the original images at all. D is solely trained using the same adversarial loss, but tries to push this loss term in the other direction compared to G. When training D, we want to maximise the likehood of D correctly classifying real and fake samples.
The training process of GAN is highly complicated and it can take an immense amount of computation time. This is why we perform pre-training. Pre-training the models (even on sub-standard generated samples) allows both models G and D to start off with reasonable network parameters. This is doubly advantageous as it reduces the chances of training failure, and also shortens training time!
Results
Here, we showcase some of the generated samples after about 80 epochs of training (nearly 3 hours on Google Colab). With a simple UNet model and a short training process, we are able to recover most of the image quality and remove simple watermarks. In the examples below, we see that the image quality has improved significantly. The numerical watermarks have also been removed nearly perfectly! However, some details such as the fine texture on the cat’s head and face have been blurred out.


Conclusion
Even though random image generation is a hot topic today, GANs are not limited in usage to these generation tasks (Faces, scenery, paintings etc). If we think out of the box, there are many creative applications that GANs are equally effective in! Apart from image quality restoration, another cool example would be image colorization, where we can go through the same process to generate a discoloured dataset and use that to train our GAN.
This article has been published from the source link without modifications to the text. Only the headline has been changed.
Source link


